Stoking the steam, one engine at a time…

- © 2018 Steve Allen Contact Me 0
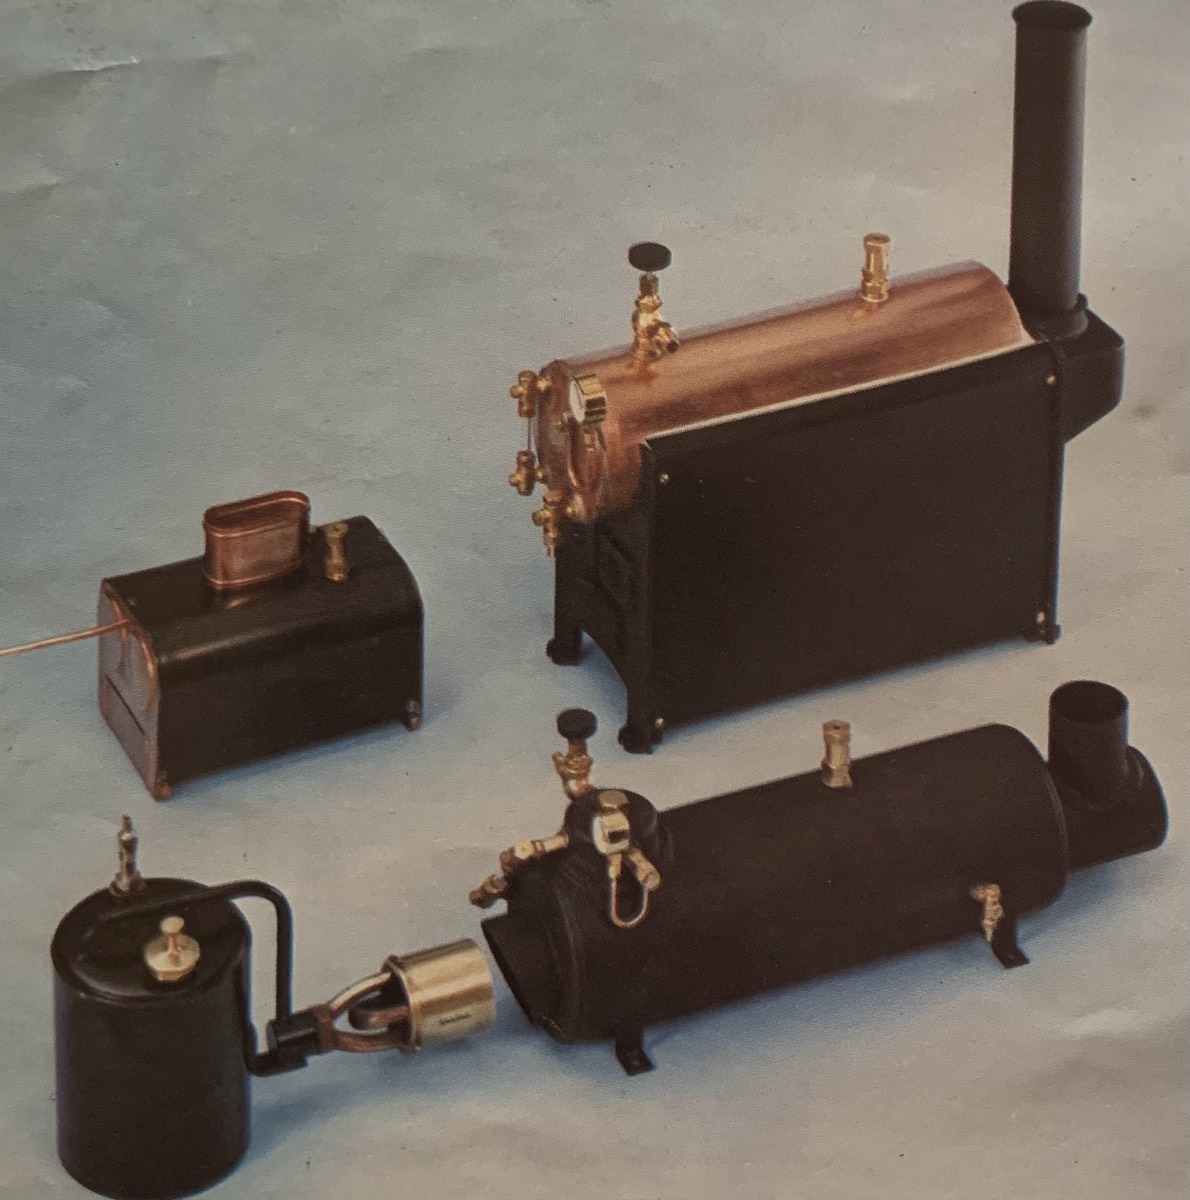
The Care and Management of Model Boilers.
CARE.
PRESSURE. All boilers supplied by us are tested before, despatch and safety valves set for safe working pressure. f
Our Babcock and Marine Boilers are intended for a working pressure of 60-lbs. per square inch, and a higher pressure should not be used.
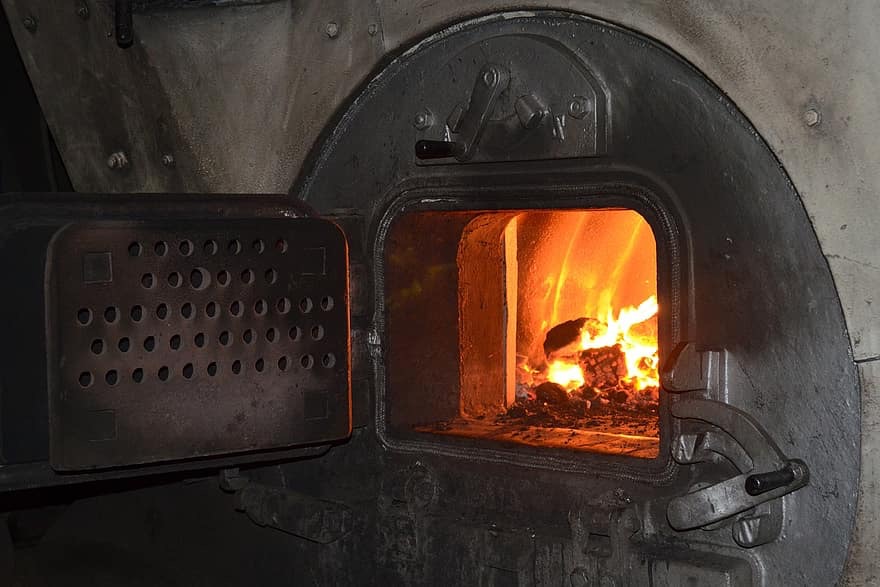
SAFETY VALVES. These are provided of ample dimensions for safety and must not be tampered with. In course of time the safety valve springs may deteriorate by corrosion or fatigue or the action of the steam. This will cause the valves to lift at lower pressures than originally intended, and the spring must be replaced by a new one exactly similar to the original one. Do not put in a stronger spring because you want more power. Remember the fate of the man who sat on the safety valve! The valve and its seat should be cleaned from time to time and kept free of dirt.
PRESSURE GAUGE. Model gauges are made with great care, but no small gauge can be made, except possibly at a prohibitive price, to read absolutely correctly. Remember, therefore, that the safety valve, if properly cared for, will look after the pressure and that the pressure gauge will show you the approximate pressure and add to the realistic appearance of your boiler.
STEAM COCK. This is provided of suitable size for the boiler. Cocks in constant use will need regrinding occasionally, and this should be done with a little fine bath brick dust and water. All cocks require to be greased from time to time to prevent the plug cutting or seizing. ‘Tallow mixed with a little fine graphite or dust from a soft blacklead pencil should be smeared over the plug and the face of the washer.
WATER GAUGE. This fitting ranks next in importance to the safety valve, and there- fore requires due attention. It must always be kept clean, and where the gauge is fitted with a blow-down cock, this should be opened frequently to clear the gauge glass of scum, and to ensure that the gauge accurately indicates the true water level. It will do this if on moving of the boiler or closing the blow-off cock the water oscillates freely in the glass. The water gauge should always be as large as possible. The larger the bore of the glass the more -accurate will be the reading. .
MANAGEMENT.
To fill the boiler unscrew the filler, if such is provided, or if not, the safety valve. Pour in the water (preferably already as hot as possible) by means of a small funnel. The boiler should be filled with water about two-thirds full or until the water shows a level near the top of the gauge glass. If the boiler is filled too full there will not be enough steam space and the boiler will “‘ prime ’’ when the steam cock is opened, i.e., water will be carried from the boiler to the engine. When, after working, the water level gets low and little water can be seen in the gauge glass, it is then time to refill the boiler, and the source of heat must be stopped. If the boiler is fitted with a pump it is preferable to use it frequently and so maintain a uniform water level rather than pump with great energy at the last minute.
A steady water feed keeps a steady pressure. If possible use rain water for your boiler, or at least as soft water as possible. If your local supply of water is hard it is worth while to boil the water first before filling the boiler, or a water softening chemical’ may be used for the same purpose.
Always keep the boiler and fittings clean.
Mounting the Fittings.
Every care should be taken in doing this part of the work not to damage the polish of the fittings and to get each one square, in line and steam-tight. They should be screwed into the boiler by hand, or if a pair of pliers is necessary, they should be protected. If too much force is used the fine threads will be stripped and the boiler and fittings spoiled.
The water gauge requires most care, Every water gauge has to be fitted individually. The two parts (without the glass) must first be screwed into the boiler until they rest on their seatings ; then if necessary turned back, or the seating filed a little until they are in line with oe gets Then try the glass in position, It must slip easily into place, and be true with the ends.
The fittings are made steam-tight by wrapping round the screwed ends a few turns of cotton (flourishing thread) soaked in a mixture of white lead and linseed oil. The cotton is drawn through the fingers to remove the surplus. Using this packing will give sufficient latitude to enable a fitting to be screwed in until it is just in the position required. After the ends of a water gauge have been fitted, the glass must be packed. A 1/2in. of rubber tubing is excellent for this. Alternatively cotton may be used. Finger tightness of the nuts only is necessary, otherwise there is danger of breaking the glass.
The safety valve, which may also serve asa filling plug, has a large surface to seat on, and should be steam-tight without packing, if a small spanner is used ; but if it leaks a thin leather washer (from an old glove) is best.

Please Consider Making a Donation